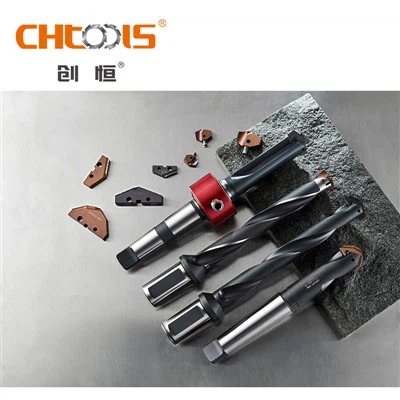
Installing an indexable drill correctly is crucial for achieving optimal performance and ensuring the longevity of the tool. As a supplier of Indexable Drill, I understand the significance of proper installation in various machining applications. In this blog post, I'll guide you through the step-by-step process of installing an indexable drill correctly, along with some important considerations and tips.
Understanding the Indexable Drill
Before we delve into the installation process, it's essential to have a basic understanding of what an indexable drill is. An indexable drill is a cutting tool that features replaceable inserts, typically made of carbide or other hard materials. These inserts can be rotated or replaced when they become worn, allowing for cost-effective and efficient machining operations. The Indexable Drill is widely used in industries such as automotive, aerospace, and general manufacturing for drilling holes in a variety of materials, including steel, aluminum, and cast iron.
Tools and Materials Required
To install an indexable drill correctly, you'll need the following tools and materials:
- Indexable Drill: Ensure that you have the correct size and type of indexable drill for your specific application.
- Spade Drill Insert: Select the appropriate Spade Drill Insert based on the material you'll be drilling and the desired hole size.
- Carbide Insert of Spade Drill: If necessary, use a Carbide Insert Of Spade Drill for enhanced cutting performance and durability.
- Wrench: A suitable wrench is required to tighten the drill holder and insert.
- Cleaning Supplies: Use a clean cloth and a mild solvent to clean the drill holder and insert before installation.
- Lubricant: Apply a small amount of lubricant to the drill holder and insert to reduce friction and ensure smooth operation.
Step-by-Step Installation Process
Step 1: Prepare the Work Area
Before starting the installation process, ensure that your work area is clean and free of debris. This will help prevent any contaminants from entering the drill holder or insert, which could affect the performance of the tool.
Step 2: Clean the Drill Holder and Insert
Using a clean cloth and a mild solvent, carefully clean the drill holder and insert to remove any dirt, oil, or debris. This will ensure a proper fit and prevent any issues during installation.
Step 3: Insert the Spade Drill Insert
Carefully insert the Spade Drill Insert into the drill holder, making sure that it is properly seated and aligned. The insert should fit snugly into the holder without any play or movement.
Step 4: Tighten the Insert
Using a wrench, tighten the insert in the drill holder to the recommended torque specification. Over-tightening the insert can cause damage to the tool, while under-tightening can result in poor performance and premature wear.
Step 5: Check the Insert Alignment
Once the insert is tightened, check its alignment to ensure that it is centered and perpendicular to the drill axis. This can be done using a dial indicator or a similar tool. If the insert is not properly aligned, it can cause uneven cutting and poor hole quality.


Step 6: Install the Drill in the Machine
Carefully install the indexable drill in the machine spindle, making sure that it is properly seated and secured. Follow the manufacturer's instructions for installing the drill in your specific machine.
Step 7: Set the Cutting Parameters
Before starting the drilling operation, set the cutting parameters, such as the spindle speed, feed rate, and depth of cut, based on the material you'll be drilling and the size of the drill. Refer to the manufacturer's recommendations for the appropriate cutting parameters for your specific application.
Step 8: Perform a Test Run
Before starting the actual drilling operation, perform a test run to ensure that the drill is functioning properly and that the cutting parameters are set correctly. This will help you identify any issues or problems before they cause damage to the workpiece or the tool.
Important Considerations and Tips
- Use the Correct Insert: Select the appropriate Spade Drill Insert or Carbide Insert Of Spade Drill based on the material you'll be drilling and the desired hole size. Using the wrong insert can result in poor performance and premature wear.
- Follow the Manufacturer's Recommendations: Always follow the manufacturer's recommendations for installing and using the indexable drill. This includes the recommended torque specification, cutting parameters, and maintenance procedures.
- Inspect the Drill Regularly: Regularly inspect the drill for signs of wear or damage, such as chipped or worn inserts, dull cutting edges, or excessive vibration. Replace any worn or damaged parts immediately to ensure optimal performance and safety.
- Use Proper Lubrication: Apply a small amount of lubricant to the drill holder and insert to reduce friction and ensure smooth operation. This will help extend the life of the tool and improve the quality of the drilled holes.
- Practice Safe Machining Procedures: Always wear appropriate personal protective equipment (PPE), such as safety glasses, gloves, and ear protection, when operating the machine. Follow all safety procedures and guidelines to prevent accidents and injuries.
Conclusion
Installing an indexable drill correctly is essential for achieving optimal performance and ensuring the longevity of the tool. By following the step-by-step process outlined in this blog post and considering the important tips and considerations, you can install your indexable drill with confidence and achieve excellent results in your machining operations.
If you have any questions or need further assistance with installing an indexable drill or selecting the right Indexable Drill for your application, please don't hesitate to contact us. We're here to help you find the best solutions for your machining needs and provide you with the support and expertise you need to succeed.
References
- "Machining Handbook", Industrial Press Inc.
- "Cutting Tool Engineering", Society of Manufacturing Engineers